Creating and Exporting a WSL Environment: A Comprehensive Guide
Written on
Chapter 1: Setting Up Your WSL Environment
If you're already familiar with the Windows Subsystem for Linux (WSL), this guide will serve as a handy reference to help you create and export your WSL environment efficiently.
Installing a Linux Distribution
When you execute the command wsl --install, Ubuntu is typically installed as the default Linux distribution. However, you can specify a different distribution by using:
wsl --install -d <distribution name>
For additional options, you can install other distributions either via the Windows Store or by running:
wsl --install -d <distribution name>
To see the list of available distributions, use:
wsl --list --online
Options include popular distributions like Debian or openSUSE-42.
Configuring the Base Environment
After installing your desired distribution, launch it with:
wsl -d <distribution name>
This environment will be the foundation for any copies you wish to create. Customize it to your liking, as these settings will be replicated in future instances.
Exporting the Base Environment
Once you're satisfied with your setup, exit the WSL environment to return to the Windows shell. To export your environment, use the following command:
wsl --export <distribution name> <export file name>
For example, to export an Ubuntu distribution, you would run:
wsl --export Ubuntu ubuntu.tar
This command packages your environment into a .tar archive, making it ready for import.
Creating New Instances of the Distribution
You can create new instances based on your exported base environment by importing the .tar file with the command:
wsl --import <new distribution name> <install location> <export file name>
For instance, to create a new distribution named UbuntuDev1 from the original Ubuntu base, you would execute:
wsl --import UbuntuDev1 .UbuntuDev1 ubuntu.tar
The file systems for these instances are stored within a virtual hard disk located at:
%USERPROFILE%AppDataLocalPackages<distribution package name>LocalStateext4.vhdx
For example, the package name for Ubuntu is CanonicalGroupLimited.UbuntuonWindows_79rhkp1fndgsc.
Accessing the New Environment
To access your newly created environment, use:
wsl -d <new distribution name>
For instance:
wsl -d UbuntuDev1
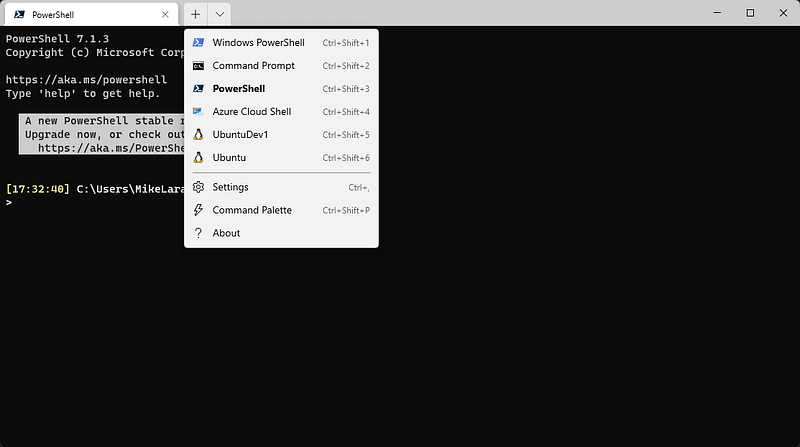
If you're using Windows Terminal, the new environment will also be visible in the dropdown profiles.

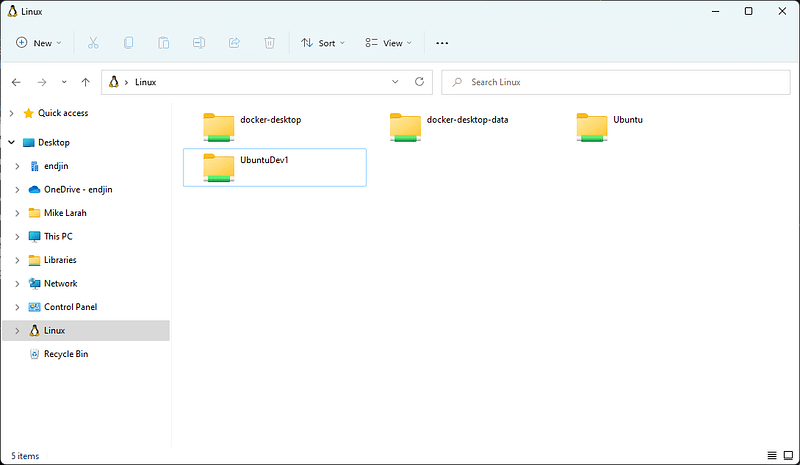
Additionally, if you're on Windows 11, you can conveniently explore the Linux filesystem of your environment using File Explorer.

Configuring User Settings in the Environment
Upon opening the new environment, you may notice that it logs in as the root user, rather than a custom user you set up in the base environment. Although your custom user is available, it hasn't been designated as the default.
To start the environment with your custom user, you can use:
wsl -d <new distribution name> -u <username>
Alternatively, to set your custom user as the default, create or update the wsl.conf file in the /etc directory of your environment with the following content:
[user]
default=<username>
You can easily create or append to this configuration file using a single command:
tee -a /etc/wsl.conf <<EOF
[user]
default=NerpNerp
EOF
Video Resources
To further enhance your understanding of WSL, here are two helpful video resources:
Importing and Exporting WSL Distributions
This video provides an overview of how to effectively import and export WSL distributions.
Export, Import, and Migrate WSL and WSL2 Installations
This video walks you through the steps to export, import, and migrate WSL installations, ensuring a smooth transition between environments.
If you haven't joined Medium yet and wish to do so, consider signing up through my referral link. It will earn me a small commission.