Create a Robust Three-Tier Architecture with Terraform on AWS
Written on
Overview of the Three-Tier Architecture
In this guide, we will build a scalable three-tier architecture using Terraform modules, allowing for easy reuse and repeatability. This architecture will be implemented within a custom Virtual Private Cloud (VPC).
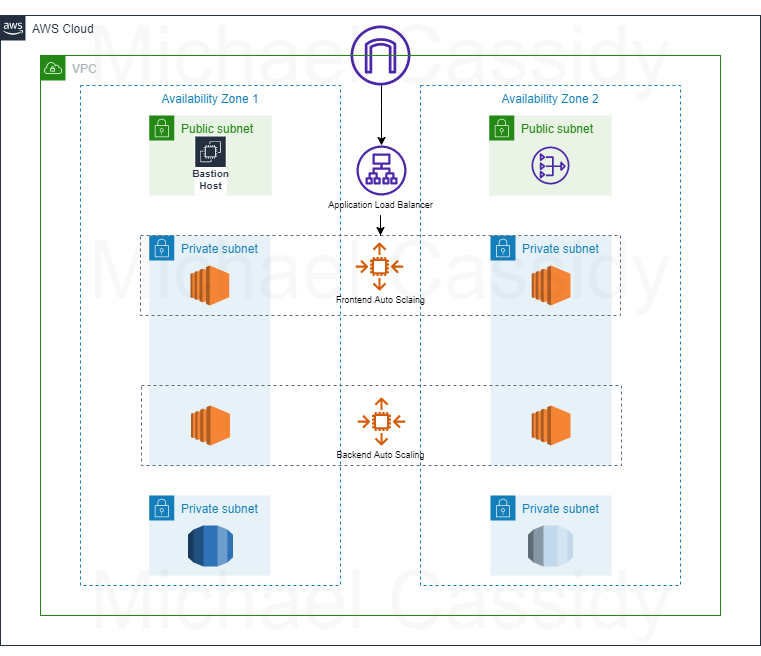
The web tier will feature a bastion host and a NAT gateway positioned in public subnets. The bastion host acts as the entry point to our infrastructure, while the NAT gateway enables our private subnets to access internet updates.
In the application tier, we will establish an internet-facing load balancer to channel traffic into an autoscaling group located in the private subnets. Additionally, a backend autoscaling group will manage our application's backend processes. We will also write a script to install the Apache web server on the frontend and another to set up Node.js on the backend.
The database tier will consist of another set of private subnets hosting a MySQL database, which can be accessed via Node.js. Keep in mind that this serves as a basic example of an infrastructure setup suitable for a web application.
For this project, I will utilize Visual Studio Code as my Integrated Development Environment (IDE); however, you can opt for Cloud9 or any other IDE that suits your preference. Note that the steps may vary slightly based on the IDE you choose.
Here's a detailed view of our architecture:
Prerequisites for the Project
- An active AWS account
- Necessary permissions for your user
- Terraform installed on your IDE
- AWS Command Line Interface (CLI) configured on your IDE
- SSH Agent (for Windows PowerShell)
Project Setup
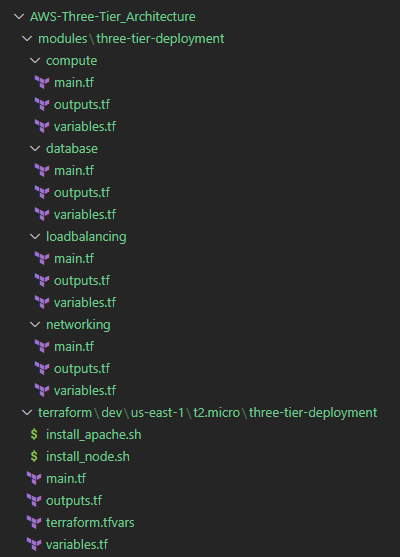
In this layout, I’ve created folders that represent the root (terraform), the development environment (dev) in the us-east-1 region, and the t2.micro instance type. The final folder houses all the root files, while the subsequent folders represent the modules (modules). This modules folder consists of four modules: compute, database, load balancing, and network.
Code Structure and Configuration
We will begin with the root main.tf file, where we will establish the locals block to reference our folder system and include each module we will be using. Within every module block, we will define various variables introduced in their respective variables.tf files. The main.tf files within each module will point to these designated variables.
Next, let’s delve into the modules!
Networking
This module will encompass the VPC, subnets, internet gateway, route tables, NAT gateways, security groups, and the database subnet group. I will break it down into sections. First, we will create the VPC using a random integer resource to give our VPC a unique name. Following that, we will include a data block to refer to our availability zones and create an internet gateway.
Next, we will establish the public subnets using a count variable to control their quantity. The cidr_block will be set to ensure that the subnets fit within the defined VPC CIDR range. The public subnet route table will route traffic to the internet gateway. We will also create the NAT gateway to connect with our private instances.
Subsequently, we will develop the private subnets that will exist within the application and database tiers, associating them with a private route table linked to the NAT gateway.
The final segment of the main.tf networking file will involve creating security groups (sg) to ensure appropriate permissions at each level. The bastion security group will allow connections to the bastion EC2 instance. Ideally, you would set the access_ip variable to your IP address; however, I have set it to permit any IP address for demonstration purposes, which isn’t the most secure practice. We will also establish the load balancer sg, frontend app sg, backend app sg, and database sg, each annotated with their respective purposes. Additionally, I have included a database subnet group to incorporate into the earlier created database subnets.
The following sections will detail the variables.tf and outputs.tf files for the networking module.
Compute
Moving on to the compute module, the main.tf file will obtain the latest Amazon Machine Image (AMI) using the AWS Systems Manager (SSM) parameter store. To gain access to our Bastion host, we will need to generate a key pair via the CLI. Execute the following command, substituting the italicized text with your specifics:
aws ec2 create-key-pair --key-name MyKeyPair --query 'KeyMaterial' --output text | out-file -encoding ascii -filepath MyKeyPair.pem
To display the key pair you created, use this command:
aws ec2 describe-key-pairs --key-name MyKeyPair
Your AWS account will retain the key pair. Below is an illustration of the process from my command line:

For Windows users, I recommend using X Certificate and Key Manager to store your keypair.pem files. Locate your PEM file in your Windows file system, create a folder for key pairs, and move the PEM file there. Copy the path of the PEM file in your Windows file system.

We will revisit the key pair later.
Next, we will create our autoscaling groups in the private subnets and attach the corresponding scripts to the appropriate group. While the bastion autoscaling group can be set to a single instance, we will opt for an autoscaling group to automatically replace a failed host if EC2 health checks fail. Lastly, we will connect the frontend group to the internet-facing load balancer.
Here are the variables.tf and outputs.tf files for the compute module:
Load Balancing
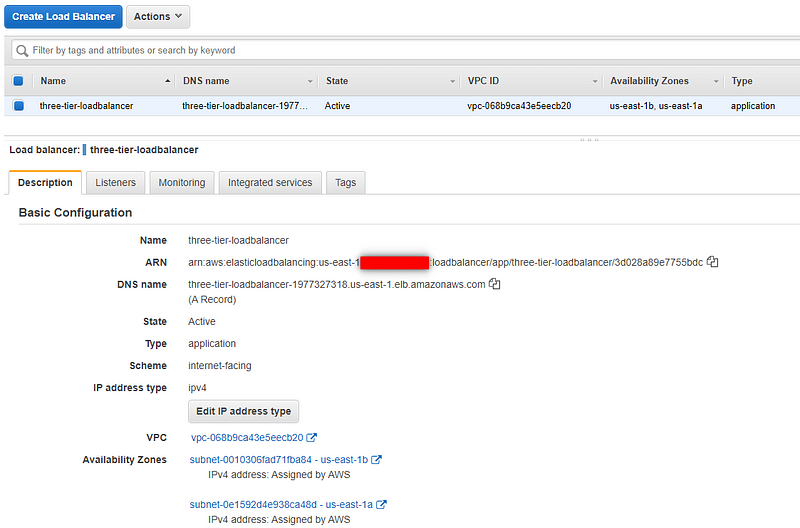
In the main.tf file for this module, we will construct the load balancer, target group, and listener. Note that the load balancer will be situated in the public subnet layer. It's crucial to specify that the load balancer depends on the autoscaling group it’s associated with to avoid failed health checks.
The following sections will outline the variables.tf and outputs.tf files for the load balancing module.
Database
In the final module, the main.tf file will contain a block dedicated to building the database. For enhanced security, you might consider adding a KMS key for database encryption.
The subsequent sections will detail the variables.tf and outputs.tf files for the database module.
Finally, we will add the variables.tf, outputs.tf, and tfvars files in the root folder.
The outputs.tf root file will instruct Terraform to display code values in our terminal, returning the endpoints for our load balancer and database.
Here are the scripts I used to install Apache and Node.js. The Apache script will help verify the functionality of the internet-facing load balancer.
Terraform Commands
Once the infrastructure as code is configured, we can apply it to our AWS account. From the root directory, execute the following commands:
terraform init
terraform validate
terraform plan
terraform apply
After executing the plan, you will see the number of resources set to be created, along with the outputs that will be displayed. Upon completion of the apply process, you should observe that all resources, including load balancer endpoints, have been successfully created.

Testing the Infrastructure
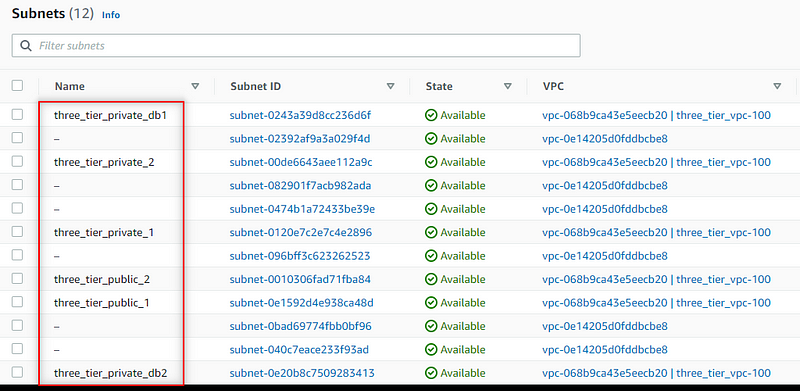
Upon accessing your AWS console, you should see the VPC and subnets, internet gateway, route tables and associations, EC2 instances in their designated locations, load balancers, and the RDS database.
VPC

Subnets
EC2 Instances
Only the Bastion will have a public IP address:

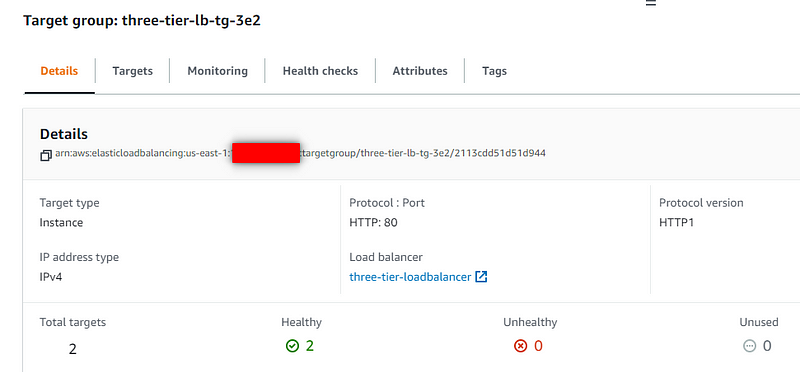
Load Balancer and Target Group
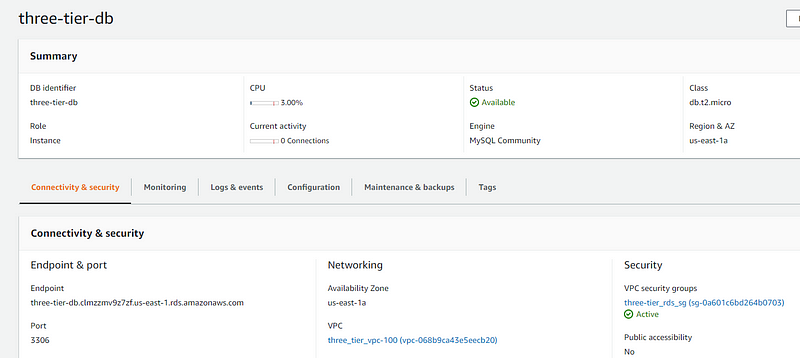
Database
By copying the load balancer endpoint obtained from the Terraform output and pasting it into your browser's address bar, you should see the message specified in your Apache web server script.

Refreshing the page should display the IP address of another instance within your frontend autoscaling group.

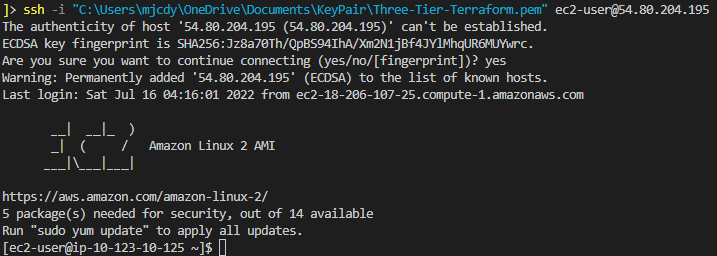
Make sure to thoroughly test your infrastructure. Use the key pair to SSH into the bastion host. Locate the public IP address of your Bastion Instance in the console:
ssh -i <Keypair_Path> ec2-user@<Public_IP_Address>
For instance, my file path looks like this:
ssh -i "C:UsersmjcdyOneDriveDocumentsKeyPairThree-Tier-Terraform.pem" [email protected]
Important Notes
To SSH into the backend application instances, ensure that the SSH agent is active if you are using Windows PowerShell. You should be able to access both the frontend and backend private subnets. Just use the private IP when accessing the private subnets and remember to bring your key pair with you. Here’s the command you would use when entering the Bastion host:
ssh -A ec2-user@<Public_IP_Address>
Ensure your SSH agent is configured and the key pair path is added to the agent.
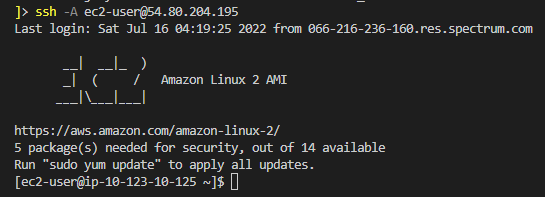
Now that we're in the Bastion Host instance, let’s proceed to the frontend application instances where the Apache web server is installed:
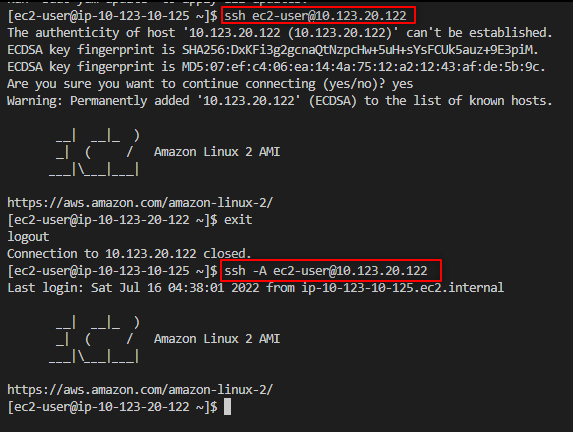
As you can see, I forgot to bring the keys with me, so I had to return to the Bastion host to retrieve them!
Next, I will switch to another frontend instance in my autoscaling group to verify if Apache is installed:

To access one of the backend application instances, I will return to the Bastion and then connect to the backend:
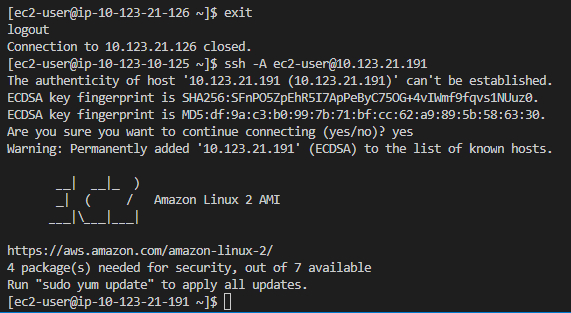
Now, let’s check if Node.js is installed:

Next, we will install the MySQL driver to connect to our AWS database using Node.js. Use the following command:
npm install mysql
Then, create a JavaScript file to connect with the database:
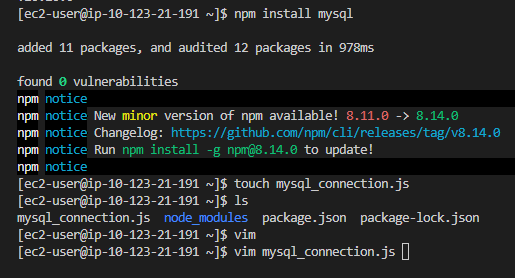
Edit the file using vim or your preferred text editor:
var mysql = require('mysql');
var con = mysql.createConnection({
host: "database_endpoint from Terraform Output",
user: "dbuser from tfvars file",
password: "dbpassword from tfvars file"
});
con.connect(function(err) {
if (err) throw err;
console.log("Connected!");
});
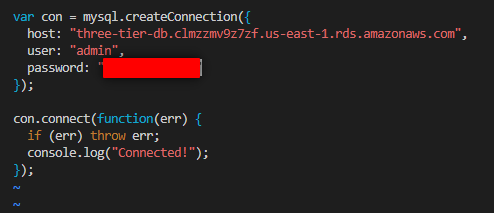
After editing, save and exit using :wq, then run:
node yourfile.js

Finally, exit the instances. We are all set here. Remember to execute terraform destroy to avoid incurring unnecessary charges for your resources. Thank you for following along!
For more insights, visit PlainEnglish.io. Sign up for our free weekly newsletter, follow us on Twitter and LinkedIn, and join our Community Discord to connect with our Talent Collective.
Chapter 2: Understanding Three-Tier Architecture with Terraform
This video covers the implementation of a three-tier architecture using AWS and Terraform, guiding viewers through the setup process and key considerations.
In this video, we explore the fundamental concepts of the three-tier architecture in AWS, focusing on how to leverage Terraform for effective deployment.